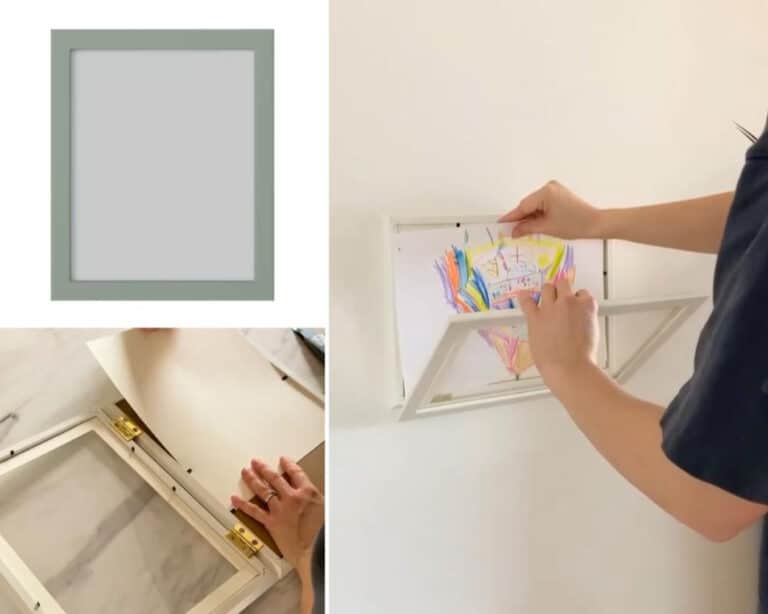
I’ve had my eyes on changeable frames like this for a while now. I figure they would make it easier to show off my son’s ever-growing collection of artwork, but a lot of the ones I’ve seen get pricey.
That’s why I love this hack from Debbie (@debstari) which highlights the popular IKEA FISKBO frames. It seems like I’m not the only one. With over 175 likes, this quick project has commenters praising its cost-effectiveness and simplicity.
You don’t need any expert DIY skills or fancy tools, and as for your IKEA list, you just need two FISKBO frames. I’m going to pick up some during my next pitstop to the Swedish superstore so I can make my own.
What You’ll Need

- 2 IKEA FISKBO Frames (8” x 10”)
- 2 hinges (1.5 inches x 1 – 1.18 inches) with matching screws
- Cutting Mat
- Two small pin magnets
- Hot glue gun and glue stick
- Drill
- Utility Knife
- Ruler
- Pencil
Turn FISKBO Into Fabulous Picture-Changing Frames
1. Connect the Two Frames
The first step is to connect the two frames using your trusty drill and hinges. Debbie offers a word of expert advice for this step, saying, “Make sure the hinges are the right size and that the screws are not too long.” You don’t want pointy screws poking out the front of the frame.
2. Add Matting
Use a ruler and pencil to mark your matting and cut it according to size. Place one solid piece in the back of the picture frame to help support the artwork.
Alternatively, you could use the backing that comes with the frame since you won’t see it once the artwork is in place. Cut another piece of mat board to create the matting for the front frame, making sure that it hides the black tabs.
3. Create the Closure
Drill two small holes in the middle of the frames and insert a pin magnet into each. Secure the magnets with hot glue, and now you can open and close your crafty DIY frame in a snap.
I feel like placing the closure opposite the side with the hinges would make your picture the most secure. You won’t have to worry about it slipping out from between the frames, which means you can swap out artwork even more quickly.
4. Hang Your New Easy-to-Open Frame
Place your picture of choice into the frame, and hang it as you normally would. Now you can open and close the frame to change up the current picture without having to rehang anything. Easy peasy.
Make It Your Own
The great thing about this hack is you can tweak it to fit your own needs (and artwork). The frames come in several sizes and colors, or you can upgrade your favorite frames to create an artistic gallery wall that shows off your unique style. Plus, the FISKBO is designed to hang either horizontally or vertically, so it’s ready for anything.
My son does a lot of drawing on regular 8.5 x 11 sheets of paper, but he’s started transitioning to larger works. Therefore, I think I’m going to also try this hack with the large 9 x 12 FISKBO frame, or maybe even the 19.75 x 27.5 (he just got a brand-new giant sketchbook).
There are smaller frames, too, if you prefer mini masterpieces. You can also adjust the size of your matting to add even more variations to the mix.
Become a Quick-Change Artist
Now, when your budding Picasso brings home another masterpiece, it’s easy to swap it out and give it some time in the spotlight. It’s like being a quick-change artist with a twist. See this hack in action and make sure to follow Debbie on Instagram @debstari for more inspiring ideas and DIYs.
Need a clever way to store multiple masterpieces while displaying your favorites? Try this smart picture frame storage box idea. Have an IKEA hack you’re proud of? Share it with us and you might be featured next!

