I needed to hang my road bike in my flat to avoid it taking up too much floor space. But I wanted something that would not look too ugly when the bike wasn’t on it and was also cheap.
So IKEA it is.
How I made my wall-mounted bike rack
Materials used:
- IKEA VALJE 35x35x35 cm. (You can also use the EKET cube in the same dimensions.)
- Protective edge banding
Step 1: Plan the cut

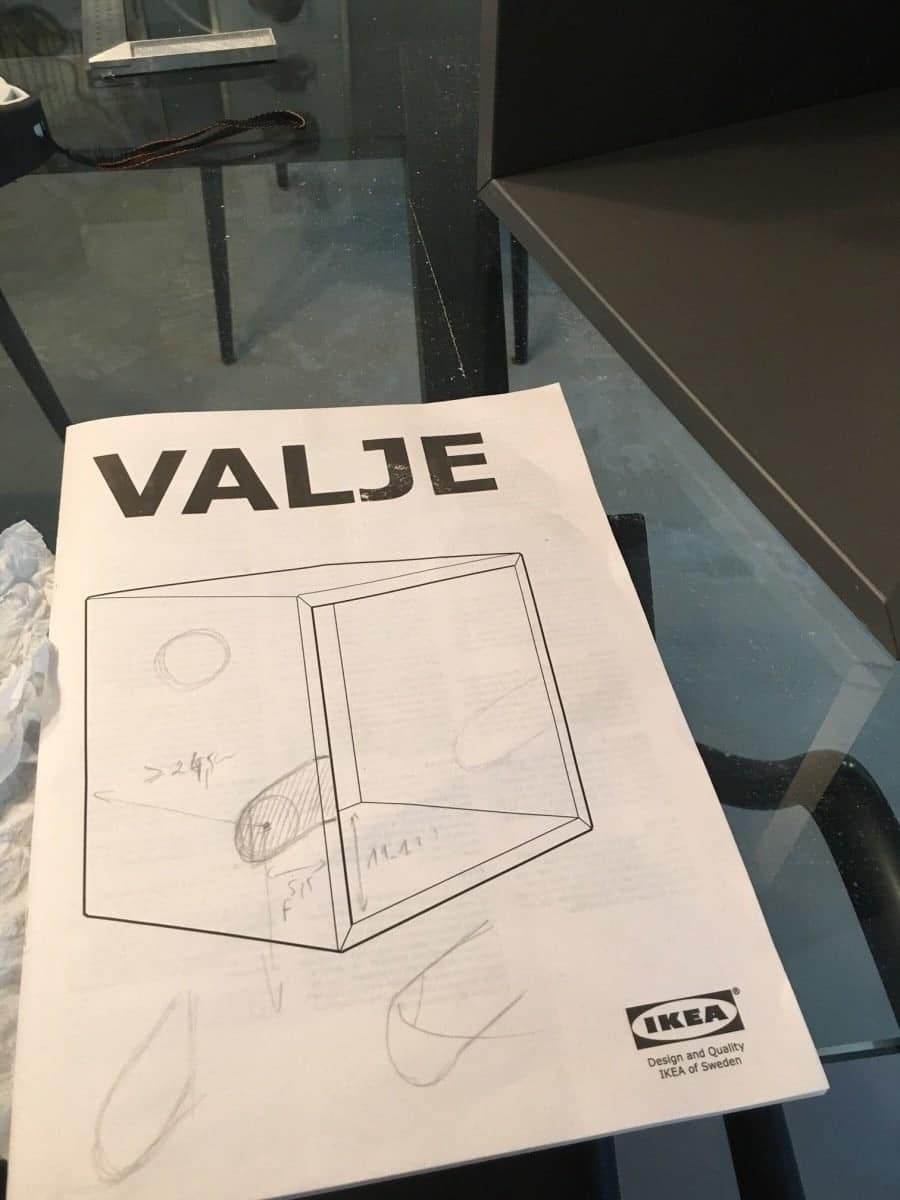
The assembly manual came in handy when planning my wall-mounted bike rack. I sketched the cut and measurements directly onto the drawing of the cube. Be mindful of the handlebars and the space you need to clear them from the wall.
The notch should dip into the shelf so gravity can keep your bike in place. I know it’s common sense, but you never know.
Step 2: Cut out the notch

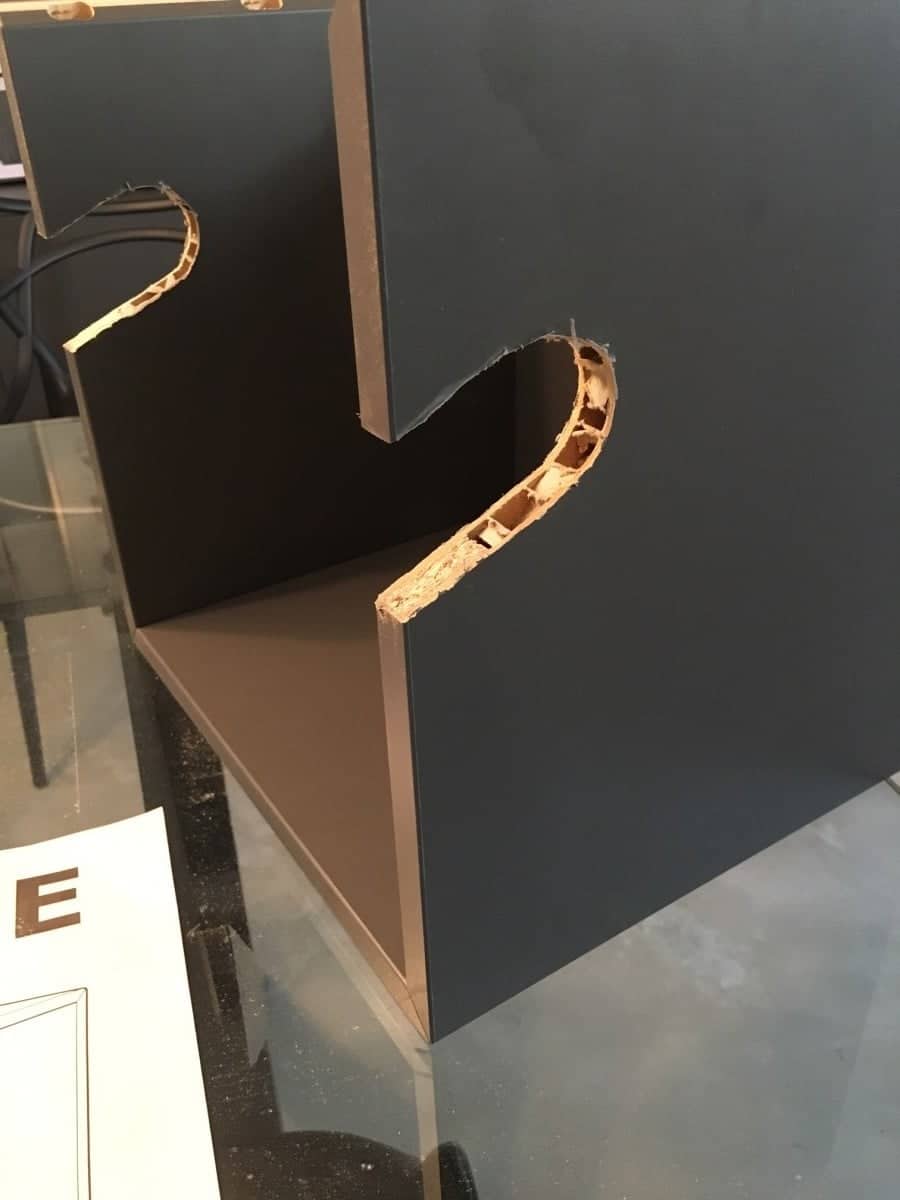
I used my Bosch jigsaw to cut a notch into the side of the cube and then used my “look-a-like” Dremel to smoothen the cut edges and rounded notch. Then, I glued on a layer of protective edge banding along the notch for protection. It also gives the bike a soft landing when I mount it up to the wall shelf.
Step 3: Wall mount the bike rack
After that, I followed IKEA instructions to wall-mount my new bike rack. Use good-quality screws and wall plugs to ensure your bike stays up. (For dry walls, make sure the screws are fastened to wall studs.)
So far, the bike rack is working great. The cube is useful for storing my biking accessories, such as gloves and helmets. Also becomes my drop zone for keys.
~ by Julien C


