
If you could create a secret wardrobe door with a hidden room, wouldn’t you jump at the chance?
Besides being super cool, it’s also a great way to add a little dash of cleverness and quirky fun to your space.
And the way Ben Hillman @benhillmantv did it also adds extra storage.
He took the popular IKEA PAX wardrobe and turned it into what he playfully calls a “doordrobe.”
It hides a small loft space where he stows seasonal decorations. Additionally, he was dealing with adding storage to an awkwardly angled ceiling, so this DIY solved that issue as well.
Ben said, “The idea was to create practical storage with clever access to the loft behind, creating something that looks far more expensive than it is, making custom panel effect doors, and for a high-end ‘doordrobe’ effect.”
I’d say he pulled it off in spades … here’s how.
What You’ll Need
- 1 IKEA PAX wardrobe
- Timber for base and support framing
- Castors (360-degree)
- Hinges
- MDF for doors and panels
- Hardware
- Basics — screw gun, drill, tape measure, pencil, saw
Creating Your Very Own Narnia — a Secret Wardrobe Door to a Hidden Room

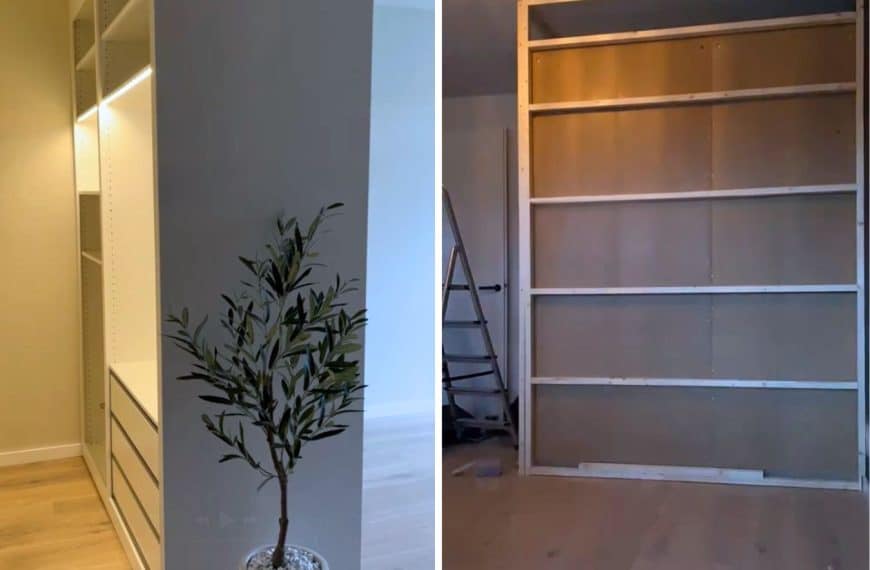
1. Build the Rolling Base
Measure and cut timber to create a raised base that fits the PAX and is tall enough to hide the castors. Cut blocks for each corner underneath to install the castors and make sure they reach the ground.
Make sure to use castors that swivel 360 degrees and can handle the weight of the wardrobe (including anything you plan to keep inside it). When you’re done, you’ll have a rolling platform perfectly sized for your PAX unit.
2. Mount the PAX and Angle the Top

Assemble the PAX, leaving off the top for now, and attach it to the rolling base. Measure the slope of your ceiling (if you have an angled ceiling to deal with) and cut the sides of your PAX accordingly to fit the top, then finish assembling.
Make allowances for the hinged side of the wall to have enough space to open the door and allow for any unevenness in the wall. For Ben, he set his PAX about 50 mm from the wall on the hinged side, covering the gap using framing and a wood panel.
This framing also creates support for the PAX when it opens and closes. Attach the PAX to the support frame using strong hinges, and test out your swing. The unit should open and close easily, thanks to the rolling platform.
3. Add the Doors and Side
Ben created a custom side panel and doors to match out of MDF, giving his doodrobe a more customized look. You could leave the PAX as-is and get IKEA doors if you want to skip this step, but it does give the piece a more sophisticated, designer finish.
Extra Advice for This DIY Doordrobe

Even though the basic rundown for this hack is only three steps, obviously, there’s more to it. You can check out the project in action and watch Ben create what might be the very first doordrobe to get more insights.
But he also offers these important tidbits to help you through the process.
- Measure precisely, because even the smallest gaps can ruin the custom look. Take your time, and don’t rush the cuts.
- Make sure the floor is 100% level; otherwise, you’ll need hinges designed for uneven flooring.
- Sketch everything out first for your space and visualize how you want the finished unit to look.
- Plan and test for the door swing clearance, including any extra thickness if you plan to add paneling.
- Don’t leave too big a gap below the base. You don’t want to give away that it’s actually a door. Ben recommends 1 to 2 mm max.
A Few Final Questions for the Hacker

How long and how much did this hack cost?
The entire project took around 2 days of work. The total cost was roughly $610.
What do you like most about the hack?
“The unexpected surprise of the entire wardrobe acting as a door to the loft space behind. The transformation — hands down. It’s incredibly satisfying seeing a standard IKEA piece blend seamlessly into the room like it was always meant to be there. It also adds value and character to the space, especially in a period property.”
Looking back, would you have done it differently?
“I’m incredibly happy with how it turned out. I will have to add a handle inside that allows you to pull the doordrobe open more easily.” His daughter suggested rebating a handle into the paneling to latch the wardrobe shut.

What about you? Would you do anything differently if you gave this hack a try?
Make sure to follow Ben @benhillmantv for more exciting and fun DIY projects!
Got an IKEA hack of your own? We want to see it! Submit your project here or tag us on Instagram @ikeahackersofficial.
NEXT: You’ll also like these IKEA PAX Hacks

The New IKEA PAX Piece That Finally Breaks Up All Those Boring Doors
Just when you think IKEA’s PAX series has everything you need to create a stellar wardrobe, they come out with a new addition to prove you wrong. Last year, they…
Wait Until You See How They Hide This PAX Built-In!
Hallways often become swirling vortexes that suck in random items, leaving a jumble of clutter and chaos in their wake. Since hallways are typically tucked out of sight, it’s all…

This Hidden TV IKEA Hack Keeps Your Bedroom Looking Calm and Clutter-Free
The easiest hidden TV idea yet—perfect for small spaces and minimalist bedrooms. Apparently, you’re supposed to keep TV out of the bedroom because the bedroom is just for sleeping and,…
How A Genius IKEA Wardrobe Hack Made a Walk-In Closet Possible
I dream about a walk-in closet. I really do. There’s something luxe about it, as long as you can organize it well. Alas, I have no space for a walk-in…

This Clever PAX Wardrobe Hack Solves a Classic Small Bedroom Dilemma
When you’re tight on bedroom space, squeezing in extra storage often means sacrificing something else, like your bedside table. But what if you didn’t have to choose? That’s what Mathilda…

This Brilliant Nursery Closet Hack Creates Custom Charm and Tons of Storage
Babies might be tiny, but they come with a lot of stuff, so you need great storage. Having an organized nursery often makes all the difference between calm and chaos…