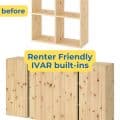
I could not find a piece of furniture for my living room that can contain my many books and did not look like an ordinary bookshelf.
Looking at the popular BILLY bookcase, I thought it would look amazing against new DIY doors with a natural material.
Raffia was my choice and it turned out fabulous.

IKEA items used:
1 x BILLY 60x120cm
1 x BILLY 80x120cm
Other materials:
Wooden battens (L-section) – buy 2.5 meter long battens that you will cut to the desired length
Optional: Wooden batten (flat) to reinforce the frames
4 x Hinges (2 for each door)
Raffia matting (natural)
Wood glue
Tools:
Staple gun and staples
Drill
Miter saw
DIY doors for the BILLY Bookcase:
1. I started with positioning the 2 BILLY bookshelves side by side where I wanted them to be.

2. Then, I took measurements of the frames and decided where I’d like to position the doors. (Do take into consideration how the doors will be fixed to the shelves as it may add a few millimeters to the measurements.)
3. Next, I built the 2 wooden frames. I used a miter saw to cut the battens (L-section), fixed them together with glue and reinforced the joints with staples. (If you don’t have a miter saw, you can use a handsaw with a miter box.)

4. I cut the raffia mat to fit the frames and fixed it in place with a staple gun to the wooden frames. (Make sure the staples are not too long – in my case I chose 5mm staples because the battens were rather thin.)
5. Optional: I didn’t do this but you might consider reinforcing the frames on the inside with a wooden batten (flat). This will make the frames stronger and easier to attach the screws for the hinges.
6. I measured where to position the hinges on the doors, which was 10cm from the edge.
7. Lastly, I installed the hinges on the doors and then fix them onto the BILLY bookshelves. You will need a drill for this step.

For the bottom shelves I fixed a flat 2mm wooden batten along the bottom of the BILLY frame to compensate the ½ centimeter gap between the bottom shelf and the sides of the frame. Have a look at the picture below and you’ll understand.

How long and how much did it cost?
Half a day and less than 50€
What do you like most about the hack?
It looks trendy and stylish.

What was the hardest part about this hack?
To fix the wooden frames to the shelves because there were very light and thin.
What to pay special attention to?
Depending on the thickness of the battens you choose for the doors, you might have to pay extra attention to the hinges. (See picture for Step 7)
Looking back, would you have done it differently?
Strengthen the wooden frames to make them less fragile and easier to fix.

~ by Stéphanie

