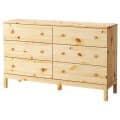
Tired of cluttered counters and misplaced items, one woman decided to tackle an organization project for her entrance hall. Unable to find the perfect narrow cabinet solution at local stores, she got creative with an IKEA furniture hack.
Frustrated by the lack of storage space between her bedroom and bathroom, Cristina Garcia transformed six IKEA MOPPE mini chests into a stylish and functional solution. With drawers placed strategically on the wall, she is now able to neatly organize all of life’s small accessories.
Hair accessories, jewelry, perfume bottles, socks, gloves, sunglasses and nail polish now have a dedicated home, keeping countertops clear and items easy to find. By taking on this DIY project with the IKEA cabinet, she gained much-needed storage and organization for her small-space entrance hall.
With the Apothecary Cabinet’s narrow design, it was the ideal option where other options had failed her. The transformation shows how resourcefulness and a little creativity can solve storage woes where retail offers did not.
Proper measurement and prep work is key for a sturdy finished project. Here is a step-by-step tutorial for making apothecary drawers using IKEA MOPPE mini chests:
IKEA items used:

- 4 MOPPE mini chests (large)
- 2 MOPPE mini chests (small)
- 4 STUBBARP wood legs in white (two pairs)
Other materials:
- White paint
- Solid wood board for base and for top (45.2″ x 15.6″ x 0.6″ thickness / 115 cm x 40 cm x 1.5 cm thickness)
- Frosted glass for top (cut to measure, optional)
- Small nails/screws
- Wood glue
DIY IKEA Apothecary Cabinet

Steps:
- Lightly sand the IKEA MOPPE mini chests and paint the chest frame and drawer fronts in your preferred color. Allow to fully dry.
- Measure and cut the wood boards for the base and top. The wooden board for the bottom “A” of the drawer units should be slightly wider than the chests (6.7 inches / 17cm). The top board “B” should overhang the chests (9.05 inches / 23cm). Sand and paint these boards as well.
- Attach the IKEA STUBBARP legs to the underside of the wood board “A” using screws. Make sure they are evenly spaced. To further support the unit, especially if you intend to use it for heavier items, you can add a leg in the middle.
- Assemble the mini chests side by side on a flat surface using wood glue between each chest. Nail or screw the chests together for stability. Cristina assembled 3 MOPPE chests in one row.
- Place and secure the first row of assembled chest units on top of the wooden board base “A”. Then stack the second row on top. Secure the rows with wood glue.
- Position and secure the top board, leaving space for the wall at the back.
- Optional: Place frosted glass on top for a finished look.
- Your IKEA apothecary cabinet is now complete!
Cristina loves her apothecary storage cabinet but if were to do it all over again, she says, “I would have added another pair of legs in the middle. But, for now, the wooden base is sturdy enough to hold the weight.”


Adding drawer pulls with labels
Drawer pulls with labels are a popular with DIY apothecary cabinets. If you’re using the storage unit like a library file cabinet organizer, the labels are a useful addition to this IKEA hack.
- The MOPPE drawers come with cut holes to open up the drawers. If you would like to add handles or knobs, flip the drawers around so that the cut holes are facing inward.
- Then, measure and mark where you want the handle holes to be located on each drawer front. The holes should be centered vertically and spaced evenly horizontally.
- Carefully drill holes in the marked locations using a drill bit slightly smaller in diameter than the handles. Test fit the handles and make any minor adjustments to the hole positions as needed.
- Use short screws to secure the handles to the drawers.
- Handles provide a polished finishing touch and allow for easy access to each storage compartment. Take time to accurately mark and cut matching handle holes for a professional, built-in look.
Styling the IKEA Apothecary Cabinet
Here are some additional ways to style the apothecary cabinet beyond painting:
Stain
Staining the wood a dark, antique color like walnut or mahogany can give it a vintage, farmhouse aesthetic. Test stains on scraps first.
Gloss

For a modern look, consider a high-gloss white or gray paint with sleek metal handles. Polish the surface for a high-end medicine cabinet.
Decorative knobs

Add decorative knobs, handles or pulls in brass, gold or silver for visual interest and contrast. Choose styles that suit your interior design preferences creating faux flat drawers instead of small apothecary styled cabinet.
Decoupage

Get crafty by decoupaging patterned paper on the drawer fronts or sides. Floral, botanical and geometric prints can introduce personality. For a natural element, apply removable contact paper with a wood grain or stone texture on the surfaces. Peel off cleanly later if desired.
Personalized style
Upgrade with glass or marble shelves or panels inset on sides, doors or the top. This brings luxury and light into the space.
Consider distressing or aging painted surfaces with sandpaper or steel wool for shabby-chic charm. Apply wax or topcoat after.
The cabinet’s style options are endless – get inspired and let your creativity shine through customized finishes.


