
I dream about a walk-in closet. I really do. There’s something luxe about it, as long as you can organize it well. Alas, I have no space for a walk-in in my current home.
Therefore, I envy this particular hack from Wendy @wonen_in_de_wittewaik, especially when she says, “With the new IKEA Pax system, this DIY is a breeze!”
I did something similar in my first house using a curtain and clothes rods, but I had a larger primary bedroom in that home.
Believe me, if my room had a few extra feet to spare, I would do this hack in a heartbeat.
Yes, I would take a beautifully organized, efficient, to-die-for walk-in closet over a bit of extra floor space any day.
If you feel the same way, and you have some space to spare, then this just might be the closet hack you’ve been dreaming about, too.
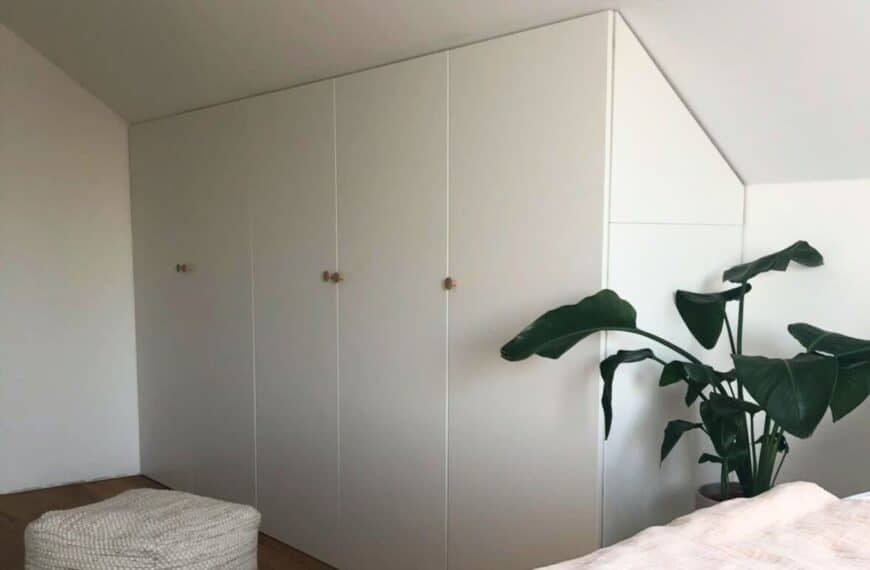
Create A Room Divider Closet With IKEA PAX
What You’ll Need
- 2 IKEA PAX frames (or more, depending on your available space)
- Timber for framing
- MDF sheets to cover the exposed side and backs of the PAX
- Molding
- Wood filler
- Caulk
- Paint and primer
- Basics — drill, screw gun, saw, tape measure, pencil
1. Assemble and Position the PAX Units
Put together the PAX frames you plan to use according to IKEA’s instructions. The size and number of frames you get really depend on how long you want your closet to be and how much space you have.
Position the PAX perpendicular to the wall. Wendy cautions to leave at least three feet of space between the wall and PAX. This way, you have room to move comfortably inside your hacked walk-in closet. (If you have a lot of space to spare, you could even put some PAX along the wall if you’re feeling ambitious.)
2. Create a Frame
Wendy used timber to create framing for the side and back of the PAX wardrobes. This is all about adding more structure and reinforcement since the PAX are basically filled with cardboard (something a few commenters brought up as a concern).
Wendy attached the framing on the side through the screws where the shelf supports would normally go. She says, “The wood is reinforced here, so you don’t screw into the cardboard part.”
Also, the frames should extend up to the ceiling, where you can attach them with appropriate hardware to create more stability. You won’t be able to screw directly into the back of the PAX. Therefore, extend the side framing slightly so you can secure the back framing into it.
3. Add the MDF Panels
Once the frames are in place, cut MDF sheets to size and add them to the side and back frames. Use wood filler and caulk to fill the screw holes and seams so you can get a nice, smooth finish.
4. Trim, Prime, and Paint
Add molding around the base of the side and back and between the ceiling and the top of the PAX to create a built-in look. Prime all of the MDF and molding, and paint as desired.
5. Add Fittings
How you deck out your PAX is up to you and what you plan to keep in your closet. IKEA’s PAX design tool is a handy way to choose the appropriate accessories, like drawers, slide-out shoe racks, hanging rods, and other organizers.
Don’t Skip the Frame If You Want to Create the False Wall Look!
One commenter asked why Wendy bothered with adding a frame and didn’t just screw the MDF directly into the PAX. Wendy addressed this in earlier comments, but it all comes down to stability.
The PAX doesn’t offer enough support if you screw straight into it, so don’t skip the frame step. You’ll end up with the MDF coming loose and looking sloppy. Even worse, you could end up with it falling and injuring you or someone else.
DIYs are great, but only if you take the time to do them safely. So, no shortcuts with the framing if you plan to make the back of the PAX look like a wall.
What If You Don’t Want to Mess With Framing?
What to do if you still want the same walk-in closet effect, but you don’t trust your carpentry skills with the framing and MDF? Here are a few ideas to get your wheels spinning, but make sure to share your creative thoughts, too!
- You could install a ceiling-mount curtain rod behind the PAX and hang curtains to hide the unattractive backs of the wardrobes.
- Wallpaper the back of the PAX units with something fun and fitting for your space.
- Paint the backs of the PAX and add adhesive molding to the edges and where the units meet to create an accent wall effect.
Ready to give this DIY a try? Check out the hack, and follow Wendy @wonen_in_de_wittewaik for more creative ways to enhance your space.

Got an IKEA hack of your own? We want to see it! Submit your project here or tag us on Instagram @ikeahackersofficial.
NEXT: More IKEA Wardrobe Hacks

He Turned a PAX Wardrobe Into a Secret Door—Wait Till You See What’s Behind It
If you could create a secret wardrobe door with a hidden room, wouldn’t you jump at the chance? Besides being super cool, it’s also a great way to add a…

This Clever PAX Wardrobe Hack Solves a Classic Small Bedroom Dilemma
When you’re tight on bedroom space, squeezing in extra storage often means sacrificing something else, like your bedside table. But what if you didn’t have to choose? That’s what Mathilda…
Kiss Wasted Space Goodbye With This Low Ceiling Storage Hack
If you were hungry and someone gave you all the necessary ingredients to make a full-course meal, wouldn’t you start cooking? I feel the same way about organizing — if…

This Genius IKEA Hack Solves Two Awkward Layout Problems at Once
When faced with sloped ceilings and a pesky staircase bulkhead, most would just give up on fitted wardrobes and turn to free-standing closets and cabinets. Not Vincenzo. Rather than settling…

Maximize Every Inch of Storage With This Pitched Roof Closet
I’ve always loved the look of a pitched roof and thought about how lucky people were with attic space they could convert into a spare bedroom. But, undeniably, sloping ceilings…

IKEA PAX Frustration Leads to Genius Kitchen-to-Closet Transformation
Handyman Matthew Jenkins found a clever way to use the IKEA SEKTION kitchen cabinets to create beautiful and functional wardrobes. “As Covid created supply issues, I increasingly turned to SEKTION…