
When I first saw Tay BeepBoop Nakamoto’s (@taybeepboop) secret speakeasy bar, I did a double-take.
On the outside, it’s a chic wall of open shelves and closed cabinets — but behind it? A hidden bar that feels straight out of a design magazine.
Tay wanted plenty of shelving for display and storage and a bar to entertain — and like any true IKEA hacker, she decided she could have both.
Her solution combines two IKEA icons, the BESTÅ cabinets and LACK shelves, into one sophisticated, secret cocktail bar.
I’m obsessed with this hidden bar hack. I’ve been dreaming of a secret art or painting hack for my own home, and this just might be the inspiration I need.
Would you try something like this?
How to Create a Hidden Bar Using LACK Shelves
What You’ll Need
- IKEA LACK shelves (number depends on how much wall space you have to fill)
- IKEA BESTÅ cabinets (again, depends on how much space you want to fill)
- Door and fittings for BESTÅ cabinets (as desired)
- Wall paint
- Primer and paint
- Handsaw
- 2 Drawer slides
- Painting or picture
- Basics — drill, screw gun, tape measure, saw, pencil
1. Prepare and Paint the Wall
Paint the wall where you plan to hang your shelving. If you want to make your paint budget stretch, you can tape off slightly lower than where the tops of the BESTÅ cabinets will go. Then, you just need to paint above the line.
Once the paint dries, measure and mark where you plan to hang your LACK shelves. Mapping this out ahead of time ensures you’ll get your spacing just right without a lot of trial and error. You can also test out your placement using painter’s tape.
2. Add Notches to the LACK Shelves and Paint
Once you know how you plan to hang your LACK shelves, measure and mark where to put notches in the shelves. These cutouts are to create an interlocking system of sorts to create your shelf grid.
When measuring, the width of the notches should be sized to fit snugly around the shelf. The notches on the shelves go about halfway into the shelf.
Cut the notches with a handsaw. Sand all of the shelving, prime, and paint.
3. Assemble the BESTÅ cabinets and Paint
Put together the BESTÅ cabinets according to IKEA’s instructions, along with any doors or other fittings. Sand, prime, and paint in the same color as the LACK shelving. Position the cabinets along the wall and secure them to the wall with appropriate hardware.
4. Hang the LACK Shelves
Mount the horizontal LACK shelves first, using your lines as a guide. Then, place the vertical LACK pieces using the notches.
5. Mount the Painting
Use drawer slides to create the sliding artwork. The size you need depends on the length of the painting you’re hanging.
Place one set on the back of the painting or panel you plan to use to hide your bar. The other set goes on the edges of the two LACK shelves that line up with the slides on the back of the picture.
6. Complete the Finishing Touches
Place LED lights under the shelves wherever you want to add lighting. Use shelf liner to add a pop of color, then stage your shelves and set up your secret bar.
They Make It Look So Easy!
The hacker admits that her video makes this hidden bar project look so simple and quick, but it’s the magic of editing. It’s a tricky one to do, primarily because of the measuring care it takes to line up all of those notches.
It’s important to make sure the notches on the LACK shelves line up with each other. Not only where they slide together, but also on the corresponding horizontal shelves, so everything fits appropriately.
Therefore, take your time and measure twice, three times, maybe even four times before you start making cuts. If you’re not sure about your measuring skills, you could always simplify the hack a bit.
Hang a few LACK shelves horizontally to create a display, then simply add the slides with the picture. You won’t get the cool grid pattern, but you would still score a secret speakeasy, which is pretty sweet.
I’m also wondering if you could use a similar idea to hide a TV? What do you think?
Watch the hack come together and find out more about how the creator did it. Make sure to follow Tay BeepBoop Nakamoto @taybeepboop for more fun ideas and inspiring DIY transformations!
Have your own hack to share? We’d love to see it! Send it our way, and you might be featured next!
NEXT: You may also like these IKEA Bar Hacks
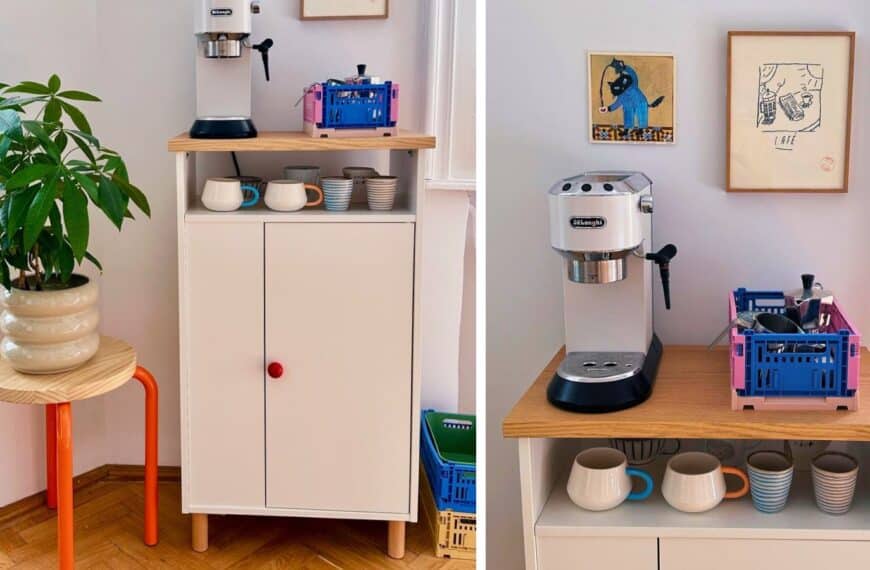
Flip, Sip, Repeat: The Upside Down IKEA Hack That Created the Perfect Coffee Nook
Looking to create a charming coffee bar in a small space? Take inspiration from this clever IKEA hack by Lexie Zhu or more popularly known by her Instagram handle @mengmengliving.…

How a DIYer Elevated IKEA IDANÄS Cabinets to Chic Built-ins
Megan wanted a more organized and visually appealing bar area. The existing setup didn’t provide enough storage, prompting her to take on this DIY project. “We had a cabinet sideboard…

Transforming IKEA bookshelves into a Speakeasy DIY Bar
IKEA furniture is known for its affordable, modular design – but one creative has taken it to a whole new level by transforming some common IKEA items into a hidden…

IKEA IVAR “Hide and Peek” cabinet hack
I recently hacked an IKEA IVAR cabinet into a drinks and display cabinet. It features gold leaf on the back which creates a striking backdrop for bar accessories. I replaced…

All-in-one beer bottle drying rack, sanitizer and storage
Zaga is a beginner home brewer. Besides her Carboy she needed a beer bottle drying rack to properly sanitize and dry the bottles. Most options she looked into were a…

Transforming kitchen cabinets to a rustic bar
I wanted to create a rustic bar, but have it be functional. I also did not want to have to build the cabinets, doors, drawer fronts, etc. (Beyond my skill…